Internet Version [Naruhodo no Mori] Vol.45
by Yumiko Mori

Vol.45 May 15th, 1999


This home-made slime bottle is made from two plastic cups. One cup is sitting on the top of another cup, and slime is moving inside these cups.
Tae: "Can I put this upside down?"
Mom: "Yes, try it!"
Tae puts the bottle upside down.
The slime flows down through a center hole into the bottom cup.
At the same time, air bubbles goes up toward the upper cup.
Big bubbles pop up from the center hole.
It is so interesting to watch the bubbles changing their shapes and the slime moving down slowly.
Tae: "This is very interesting!"
Mom: "You can enjoy playing with this toy for a long time."
Tae: "Can I make my own?"
Mom: "Yes, you can.
But you should make soft slime."
Tae: "Why?
Slime doesn't come down if it is too hard?."
Mom: "Well, it comes down eventually.
But very slowly.
I get easily irritated if it's so slow."
Tae: "Maybe you should make a slime bottle with hard slime.
Then you should train yourself to become more patient."
| borax | a teaspoonful | (You may be able to obtain from your pharmacy) |
| Polyvinyl alcohol (PVA)-based laundry starch | 1 bottle | |
| A glass cup | (for making saturated borax solution) | |
| Food coloring | small amount | (You can also use watercolor paints) |
| A chopstick | 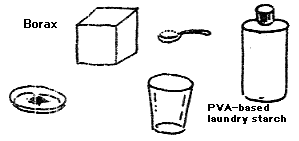 | |
| A plastic plate | (For example, you may be able to obtain from a plastic food container.) | |
| 2 clear plastic cups | (the same size) | |
| Scotch tape | 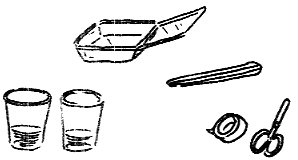 | |
| A pair of scissors | ||
| A cutter | ||
| A marker | ||
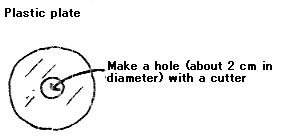
<Slime making steps>
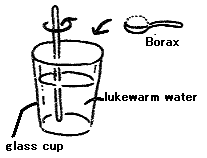
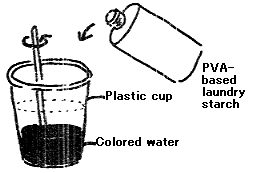
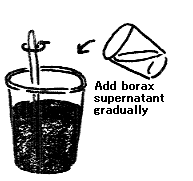
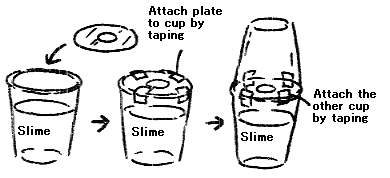
* You can adjust the hardness of the slime by increasing / decreasing the amount of the laundry starch.
Less amount of the laundry starch results in softer slime.
* Try making a slime bottle with two slimes with different colors.
Check what happens.
Change the number of holes or the size of the hole.
* Reduce the amount of the slime by a half, then insert a pingpong ball in the bottle.
Do you think the pingpong ball is going to float?
Slime making remains the most popular experiment for children. But some other people asked me "How can we use these slimes?". I didn't have a good answer. Now I have an answer, "You should make a slime bottle." Seeing the way slime is coming down in the bottle, I thought about incidental overlapping, encounter, and rule of physics. Every time I flipped the slime bottle, I saw the slime coming down in a different way. Even if two children grow up with the same parents in the same environment, the two may have different lives.
| Author | Yumiko Mori (Zushi, Kanagawa, Japan) |
|---|---|
| Illustration | Mitsue Ogata |
| Translator | Akira Ishihara |
| HTML format | Muneo Kume |

